TL;DR
Moving your rig into a closet and applying strategic acoustic treatment can drastically reduce noise and echo. Proper placement and ventilation are key to keeping your system cool and quiet.
Imagine turning a tiny closet into your personal sound fortress. The noise from your AI rig, once a constant distraction, becomes a distant whisper. The secret isn’t just in fancy foam—it’s about smart placement, sealing gaps, and giving your machine room to breathe.
In this guide, you’ll learn how to make your closet workspace quieter and more efficient. Whether you want to block sound, improve clarity, or keep your rig cool, these techniques will help you get there without breaking the bank.
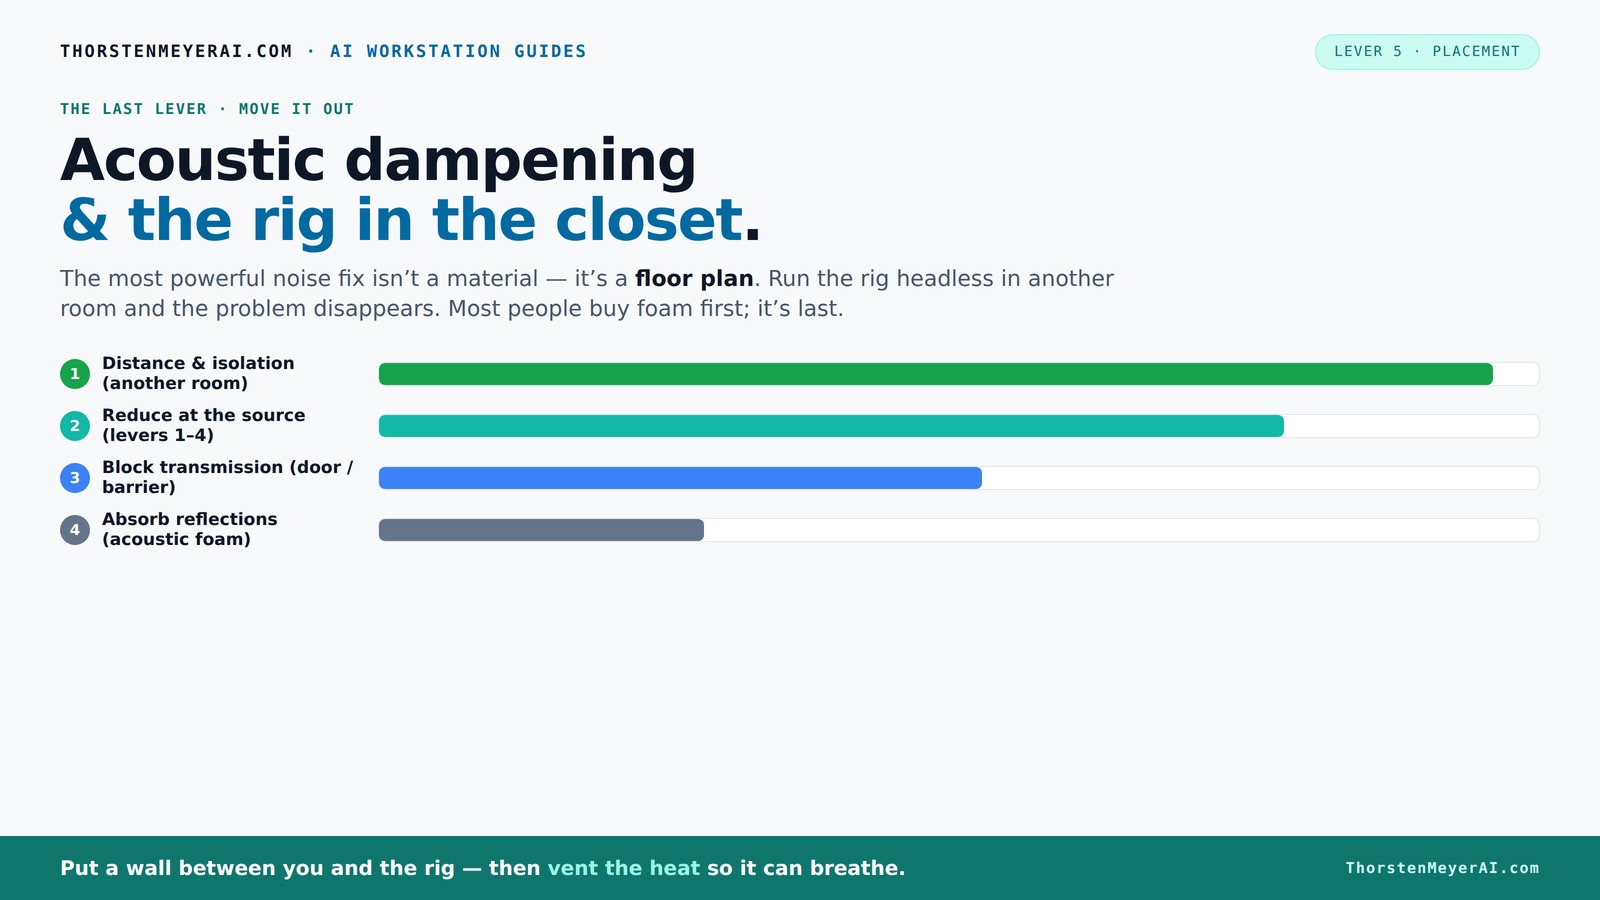
Acoustic dampening
& the rig in the closet.
The most powerful noise fix isn’t a material — it’s a floor plan. A rig you can’t hear because it’s in another room beats any amount of foam. Tap the approaches in Part 1 to see what actually works.
(another room)
(levers 1–4)
(door / barrier)
(acoustic foam)
Contain the noise, not the heat
Key Takeaways
- Moving your rig into another room or closet can reduce noise by over 50%, making it the most effective first step.
- Sealing gaps around doors, vents, and cables often cuts sound leakage by 10-20 dB, doubling as a quick DIY fix.
- Cover at least 70% of small room walls with dense absorption materials for noticeable echo reduction.
- Ventilation is crucial: any closet or small space housing a hot rig must have active airflow to prevent overheating.
- Bass buildup is less critical in tiny closets, but strategic placement of soft materials can improve overall sound clarity.
acoustic soundproofing foam panels for computers
As an affiliate, we earn on qualifying purchases.
As an affiliate, we earn on qualifying purchases.
Why Acoustic Treatment Alone Won't Silence Your Rig
Acoustic foam and panels are great at reducing echo inside a room but do little to block sound from escaping or entering. Think of foam as softening a room’s reflections, not stopping noise from leaking out or coming in. If your goal is silence, focus first on sealing gaps and blocking sound transmission.
For example, adding foam to a closet won't stop loud GPU fans from disturbing your neighbors. It’s like putting a sponge in front of a leak—it absorbs some water but doesn’t stop the pipe from dripping.
Understanding this distinction is crucial because it influences how you approach your setup. Over-relying on acoustic panels can give a false sense of security; without proper sealing and soundproofing, noise will still escape. The tradeoff is that acoustic treatment is easier and less expensive but less effective for complete sound isolation. Combining both methods yields the best results, but knowing their limits helps you set realistic expectations.
soundproof closet door seal kit
As an affiliate, we earn on qualifying purchases.
As an affiliate, we earn on qualifying purchases.
How to Use Placement and Gaps to Your Advantage
The biggest noise reductions come from strategic placement and sealing gaps. Moving your rig into another room or a closet can dramatically cut noise levels because sound diminishes with distance and obstructions. For example, placing your rig in a closet with a door closed can reduce noise by up to 70%, but only if the space is properly sealed.
Sealing all cracks around doors, vents, and cable inlets is essential because even tiny gaps act as sound leaks—like tiny holes in a boat. Acoustic sealants or weatherstripping can block these leaks, preventing sound from escaping or entering. This step often yields a 10-20 dB drop in noise levels, which can be the difference between a disruptive noise and background hum.
However, tradeoffs include potential airflow restrictions, so ventilation must be carefully balanced to avoid overheating. Proper sealing also prevents sound from bouncing around inside the enclosure, which enhances the overall soundproofing effect. The key is understanding that placement and sealing are your first line of defense—cost-effective, straightforward, but requiring attention to detail for maximum impact.
quiet computer ventilation fan
As an affiliate, we earn on qualifying purchases.
As an affiliate, we earn on qualifying purchases.
The “Rig in the Closet” Setup — How to Keep It Cool and Quiet
Putting a hot, high-powered machine in a small, enclosed space can trap heat, leading to thermal throttling where fans spin faster to cool the system, thus increasing noise. This creates a vicious cycle of heat and noise. To prevent this, proper ventilation is essential. Passive vents can help, but active cooling solutions are more reliable for maintaining safe temperatures without adding noise.
Installing a quiet exhaust fan or ducted cooling system helps move hot air out efficiently. Using thermostatic controls ensures fans only run when needed, reducing unnecessary noise. For instance, a low-noise duct fan combined with a temperature sensor can keep your rig cool while staying inaudible during normal operation.
Engineered soundproof cabinets with integrated cooling are a sophisticated solution—they use absorption materials to dampen sound and incorporate ventilation to prevent overheating. These setups are especially beneficial if you need near-silent operation for recording or sensitive work, but they require careful design to balance soundproofing and airflow. The tradeoff involves added complexity and cost, but the payoff is a quiet, safe environment for your rig.
soundproofing materials for server closet
As an affiliate, we earn on qualifying purchases.
As an affiliate, we earn on qualifying purchases.
The Right Materials for Small-Space Soundproofing
In tiny spaces, dense absorption materials like mineral wool or fiberglass batts are more effective than foam panels alone because they provide higher mass and better sound absorption across a broader frequency range. Covering at least 70-80% of the walls with these materials creates a substantial barrier to sound transmission, making your space much quieter.
Using mass-loaded vinyl or acoustic sealant to block leaks complements absorption, preventing sound from escaping through small gaps. DIY solutions like moving blankets and thick fabrics are effective because they add mass and dampen vibrations. For example, hanging a heavy blanket over the door or lining walls with thick fabric can reduce sound escape by an additional 10 dB, especially in small, confined spaces.
The tradeoff is that more coverage and sealing require effort and investment, but they significantly enhance soundproofing. It’s about creating a dense, absorptive environment that minimizes both reflections and transmission, which is crucial in small rooms where every sound leak or reflection is magnified.
Bass Traps and Reflection Points — Do You Need Them in a Tiny Closet?
Bass buildup is generally less of an issue in tiny closets because the small volume naturally reduces low-frequency resonances. However, if you notice muddiness or boominess in recordings, addressing bass issues can improve clarity. Placing bass traps in corners or along the floor helps absorb these low frequencies, but in very small spaces, broad coverage of walls with dense, soft materials can often outperform corner traps alone because they evenly distribute absorption, reducing problematic standing waves.
For example, in a 3x4 foot closet, covering side walls with thick acoustic panels can significantly improve sound clarity more effectively than focusing solely on corner traps. The goal is to prevent low-frequency buildup that causes muddiness, which is more about overall room treatment than isolated trapping. Understanding that in small spaces, broad absorption often yields better results than targeted bass traps helps you make smarter choices, balancing cost and effectiveness.
Practical Layout Tips for Your Closet Rig
Positioning your microphone and speakers carefully is vital to minimize reflections and standing waves. Place your mic at ear level, about 6-12 inches from the wall, and angle it slightly away from reflective surfaces to reduce direct reflections that can muddy recordings. Using soft materials like rugs or cloth on your desk helps absorb vibrations and echoes, creating a cleaner sound environment.
Effective cable management not only keeps your workspace tidy but also reduces additional echo and vibration caused by clutter. Suspended ceiling mounts or wall-mounted mic booms can keep your microphone in the optimal position, preventing sound bouncing off cluttered surfaces. These small adjustments can drastically improve your sound quality and make your space more acoustically friendly.
When and Why You Should Upgrade to a Proper Soundproof Room
If external noise is your main issue, acoustic panels won’t fix it—your rig needs actual soundproofing. For heavy noise sources, consider building or buying a dedicated soundproof booth or room with mass, sealing, and ventilation. These setups can block noise up to 60-70 dB, effectively isolating your workspace from outside sounds and preventing your noise from disturbing neighbors.
For example, a purpose-built soundproof booth in a garage can create a near-silent environment suitable for recording, mixing, or quiet work. While the investment is higher, the advantage is a controlled environment that offers consistent sound quality and noise isolation. The tradeoff involves increased cost and setup complexity, but in situations where silence is critical, it’s often worth it.
Frequently Asked Questions
What is the difference between soundproofing and acoustic treatment?
Soundproofing blocks noise from entering or leaving a space, using barriers, mass, and sealing. Acoustic treatment reduces echo and reflections inside a room, mainly with absorption panels and diffusers. Both work together but serve different purposes.
Can I really turn a closet into a vocal booth or mini studio?
Yes, with sufficient absorption, sealing, and ventilation, a closet can become a surprisingly good recording space. Cover walls with dense panels, seal gaps, and add soft materials for the best results.
Where should acoustic panels go in a closet or small room?
Focus on first reflection points—side walls, ceiling, and behind the microphone. Cover at least 70% of the walls for a noticeable difference. Use mirror checks to find the right spots.
Do I need bass traps in a closet, or are panels enough?
Bass traps are less critical in tiny closets, but if you hear muddiness, placing traps in corners or broad wall coverage with soft materials usually helps more than obsessing over corner traps alone.
How much wall coverage do I need for noticeable improvement?
Cover about 70-80% of the walls with dense, soft materials in small rooms. Less than that, and echo reduction will be minimal. Focus on strategic placement and coverage for the best bang for your buck.
Conclusion
Turning a closet into a quiet, efficient workspace is about more than slapping on foam panels. It’s a careful dance of placement, sealing, and ventilation. Your rig can roar in peace — just make sure it has room to breathe and a well-placed blanket or two.
Remember: the best soundproofing isn’t just about blocking noise. It’s about controlling where it goes, how it’s absorbed, and making your system’s heat and sound work for you, not against you.